So, without further ado, here's your first mentally invigorating tutorial! I'm calling it "Imagine the Possibilities" (so original, I know...ha!). It's a Stampin' Up! piece that I did {MY WAY}. I certainly hope you enjoy it and leave me some feedback, please!

Phew! That was easy! I was worried I couldn't do it.
Alright folks, thanks for stopping by!
Oh, sorry, bad joke!

That ruler is from my husband's last duty station...

The next picture is of our Pennant Punch --- LOVE IT!

Now, here's what you do:


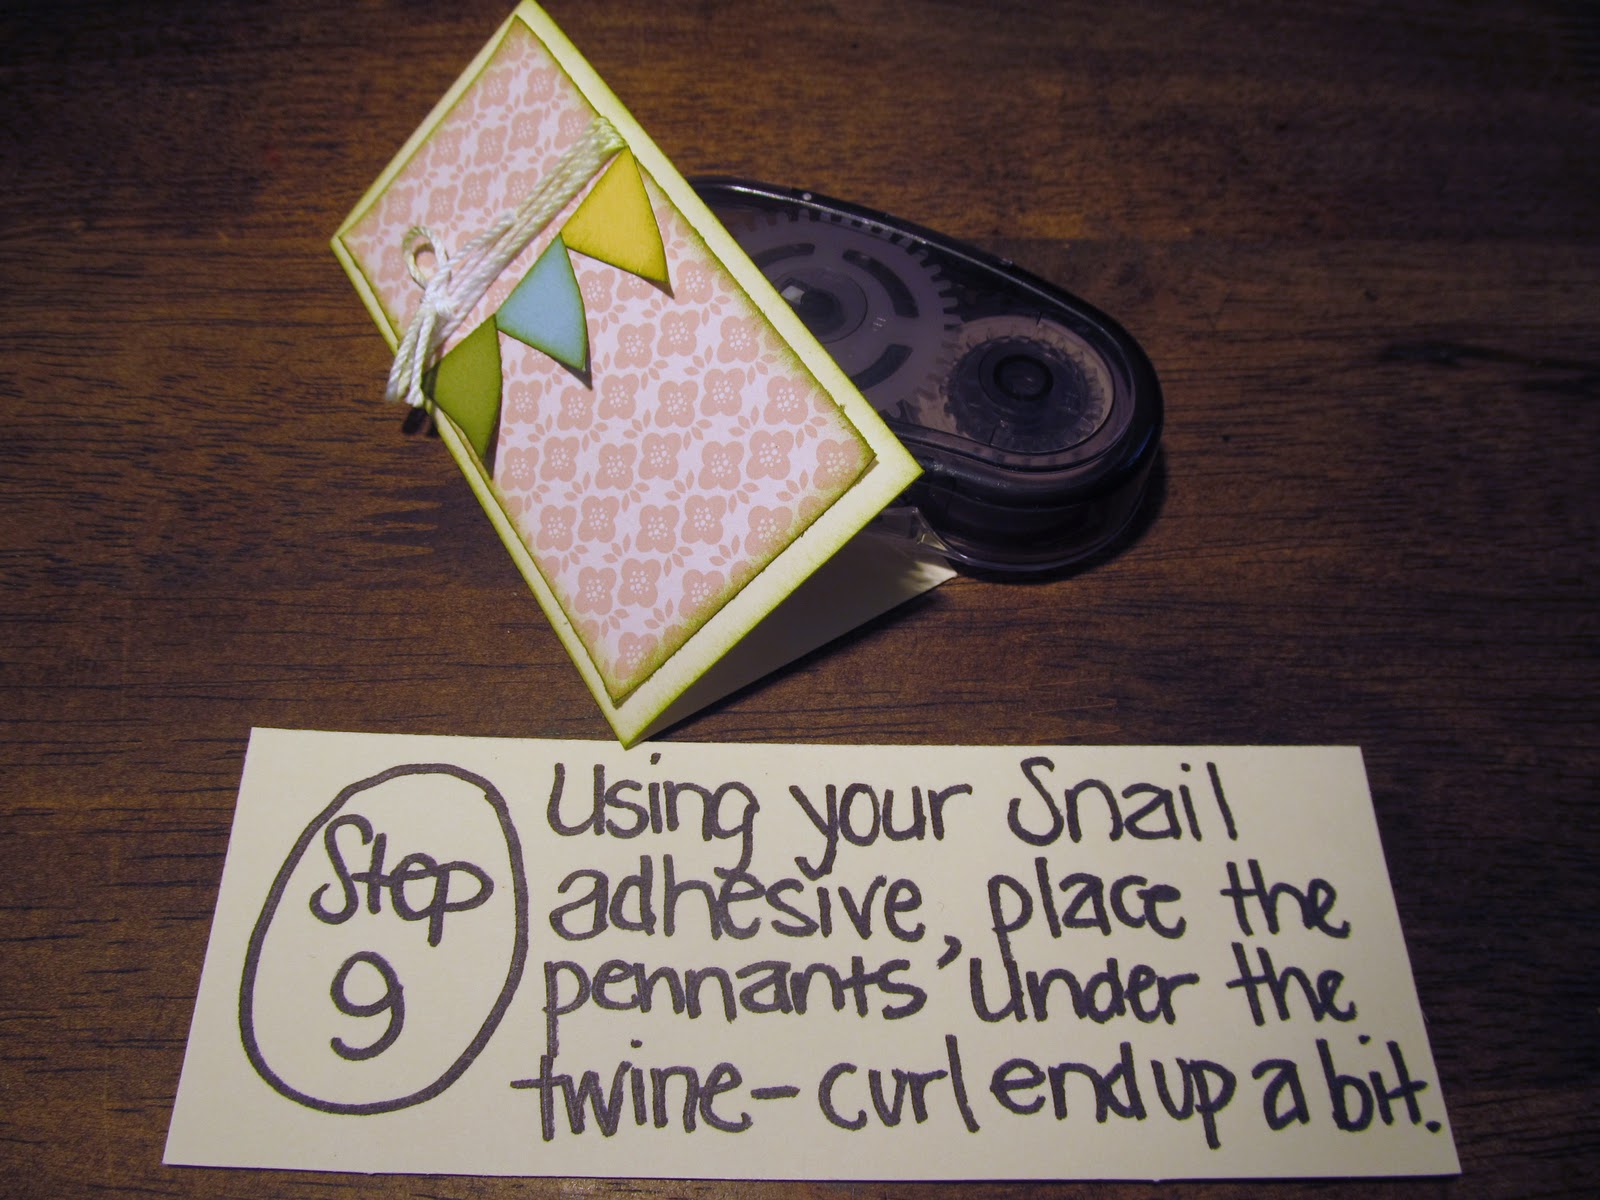
Then...

"My Way" was our Stampin' Up! Leadership theme!
So, make this YOUR WAY!

I probably shouldn't note this, but did you notice that I ran out of room for the "d" on "around"? I suppose the ' was good for now.
Go get your stapler! You're going to use it!


I really like simple details. Sometimes, they're "just enough".

The end is near, I promise! Only one step left!

*DEEP BREATH & SIGH*
[and now, a hearty laugh!]
That was fun for me to do!!! I hope that it was easy to follow along with and read. Like I said in the beginning, I need to get some tips from my [photographer friends]!

So, a couple shots of the finished product from me. How'd yours turn out? What did you do differently? I'd love to hear about it! Leave me some feedback, please!
One piece of 8.5x11 Very Vanilla Cardstock (cut to 4x4, scored at 2" and a scrap strip cut 2x10/16...or, 5/8 as my husband said!)
One piece of 6x6 2010-2012 In-Color DSP (Designer Series Paper) in Blushing Bride
One piece of each 8.5x11 Baja Breeze, Daffodil Delight, and Lucky Limeade (just using a 2x2 square, big enough to hold onto as you punch out your pennant from the Petite Pennants Builder Punch)
White Baker's Twine (22", wrapped around DSP strip and tied into a bow)
Lucky Limeade Stampin' Write Marker (to ink the "Imagine" sentiment)
Stampin' Up! Sponge (cut into wedges and used for inking paper edges)
Stapler
Cute card, fabulous tutorial Jenn! Thanks for sharing!
ReplyDeleteThanks, Sharon! I really appreciate your feedback!
DeleteStampin Up! DemonstratorFebruary 2, 2012 at 11:27 PM
Fantastic job on this tutorial.... I love that you just wrote the directions and photographed them along with the stages. You have inspired me to try my hand at a tutorial for my blog, Paperplaydates. I've never done it before either! Hope to see more of them:)
ReplyDelete